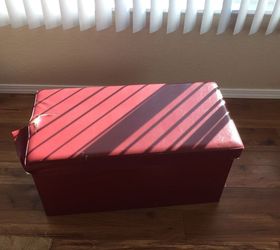
I bought this little ottoman last year. Of course it didn't take long for one of my kids to rhim it. I've been trying to think of a way to fix it. And today I thought of a way! So off to Joanne's craft store I went. I knew the ottoman had good cushion, so all I really needed was fabric. And I found the perfect burlap, on sale!Isn't this burlap absolutely perfect!? I removed the cheap vinyl cover that was tore on the lid.
 Heated up my glue gun and measured the burlap to fit tucked over the edge of the lid. Once the glue gun was heated, I wrapped the burlap onto the ottoman lid and glued the edges onto the under side. I really didn't pay attention to perfection as I figured no one but me will see that. But if I was doing this for someone else, I definitely would've put more precision in here.
 Pulling the burlap as taut as possible, I hot glued it into place
 I did the longer sides first and the ends I folded like a Christmas present, knowing I'd be using furniture tacks to hold the burlap more securely with the glue.
 Once I glued the burlap on the way I wanted, I then placed the furniture tacks to hold it more securely and to add a bit of charm and texture. The tacks were longer than the wood so the sharp pieces went straight through. I bent them, hammered them down and put a dot of hot glue on them to prevent being poked in the future.
 And the final product. I love how it turned out. I completed this project in about an hour. The burlap was on sale so that was a plus, I bought 3 years I case I decide to cover the rest of the ottoman at a later time.
Original article and pictures take http://www.hometalk.com/10913635/refurb-an-inexpensive-big-lots-ottoman site


Комментариев нет:
Отправить комментарий