When we moved into our new home we had this huge problem. It was a big dark wood fireplace mantel with paneling and trim that went all the way up to the ceiling. Yes, all the way up to the 11 foot ceiling. It was TO. MUCH. BROWN. We couldn’t even begin to decide what color furniture to put in the family room with that big brown elephant casting his shadow over the whole place.My husband, who has a good eye for decorating, suggested we paint it white to match the rest of the woodwork in the house and that which we plan to add. That was good, but I sat and stared at it for hours, I knew that wasn’t going to be enough. Of course, watching some episodes of Fixer Upper with the Gaines might have sent me in the right direction, and that direction was shiplap!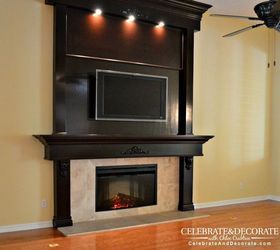 I would like to say this was a project my husband and I took on together, but it was pretty much a project I supervised and he did all of the actual work. He is a good, good man. Once he understood what I wanted, he did an incredible job. The picture above shows the embellishments on the fireplace that do not jive with my desired style, so those really needed to go first.
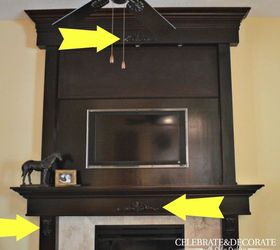 Here he is, the amazing man removing those wood ornamentations piece by piece. My job was to run around the room and pick up all the little pieces that flew off.
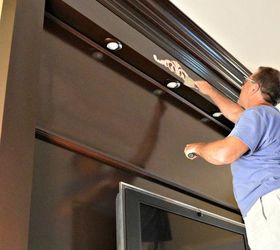 Those two little pieces came off fairly easily, but the corbels beneath the mantel were not budging. We think they are back screwed on, so they will stay for now until I have a professional in to remove them.
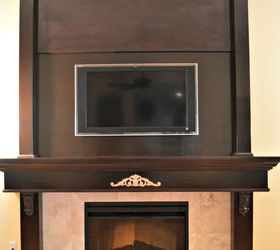 Next came the sanding to knock off the high gloss finish and prepare this baby for paint! Then it will be time for the shiplap! Now is where I have to get honest and upfront. This is not really shiplap, just looks like it when it is when it is finished, so this is my “faux” shiplap. Real shiplap planks are usually inexpensive wood anywhere from 3 to 10 inches wide. It has a little groove cut into the edge of it, so you get that look of a gap, but not a true gap in the finished project. Here is a picture that gives you an idea of what a shiplap board looks like:
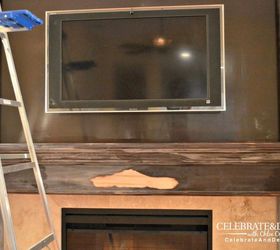 It was time to head off to the Home Depot for some wood. I don’t think shiplap is even something you can purchase without ordering ahead of time unless you are going to a specialty lumber yard. We wanted the shiplap to match the higher quality wood trim on the rest of the facade so we went with high quality pine boards.
 We had a little extra glitch in that the top third of the facade is raised out 3/4 of an inch so 1′ x 2″ furring strips would bring the shiplap on the bottom out so that the shiplap wall is all the same depth from the mantel to the top molding.
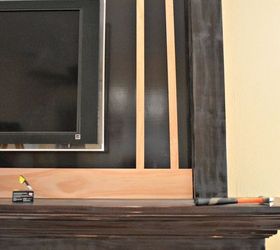 To get the look of shiplap, we put nickels between the boards as they were nailed onto the furring strips. That gave just the right amount of space to simulate the rabbet on real shiplap boards.
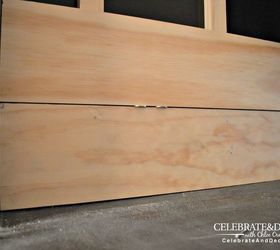 Here is how the work progressed, with the second board being nailed into place. You can see in this photo how the furring strips had to be added up to the section that stood out 3/4″. Luckily this was an easy fix. You can also see how the second board tucked right under the edge of the television.
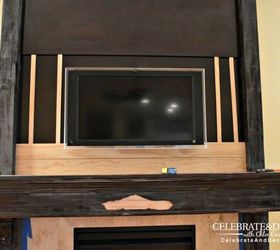 We bought 13 boards, each of them a 1″ x 6″, of select pine. Eight feet long worked for us, we then had to cut them to fit. A note here about the television. This TV was here when we bought the house and we didn’t want to replace it yet, so we also did not want to have to take it down for this project. It was a simple matter to cut the boards that would go behind the television into shorter pieces to secure them around the mount for the TV. I don’t think even if I peer behind the television I can see that the boards don’t go all the way across.
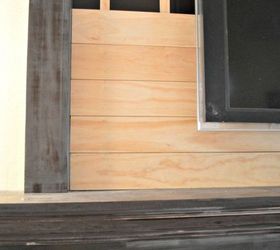 Here is a picture of the shiplap all in place. There was a small gap at the top that had to be caulked, but otherwise it fit perfectly. We added some of the 3/4″ furring strips to the sides where the ends of the boards fit to give it a more finished look. Now was time to begin painting.
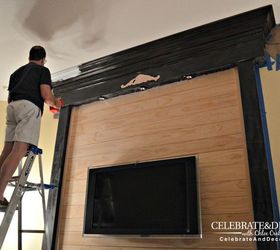 It is getting exciting now, that may just be a coat of primer, but it is already looking better!
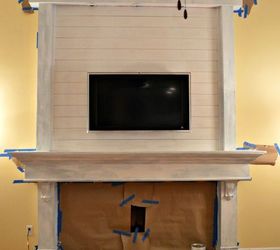 Here it is, the shiplap fireplace! I love my new fireplace and I can now begin to imagine what furniture would go in this room. It doesn’t hurt that the yellow walls are gone now, replaced by this very light blue. The paint we used is Benjamin Moore Lily White. The big old elephant is gone!
Original article and pictures take http://www.hometalk.com/10885155/how-to-shiplap-a-fireplace-or-a-wall site
Комментариев нет:
Отправить комментарий