For years I've collected milk glass, particularly hobnail milk glass, so this year I decided to try my hand at creating a hobnail pumpkin! Admittedly, once I started on the one million tiny dots, I thought to myself, "I've made a huge mistake!," thinking that I would never finish. However, once I got in a rhythm, I finished this little DIY in less than 30 minutes, and I couldn't be happier with the outcome. Read below to find out how you can recreate this vintage inspired pumpkin to add to your fall decor.MATERIALS:
- Faux Pumpkin
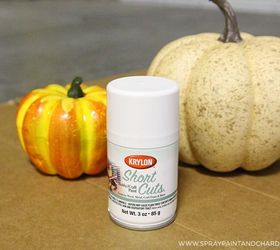
- Krylon Short Cuts Spray Paint [Gloss White]
- Tulip PUFFY Dimensional Fabric Paint [White] In a well ventilated area, using Krylon's extremely easy to handle Short Cuts spray paint, paint your pumpkin a high gloss white. I'm obsessed with these smaller cans, as they're perfect for small projects like this, and for some reason I almost feel like they have better coverage. Dependent upon the color of your faux pumpkin, you might need two to three coats. Make sure to let your pumpkin dry between coats to avoid drips.
 After your pumpkin has completely dried, pick it up by the stem to move it to a work area. I made sure to have some actual hobnail glass nearby so that I could properly mimic the pattern of the dots. Using fabric paint, which has the perfect teeny-tiny tip for this project, I just started down the middle of the first 'panel.' Once I had one vertical row of dots, I started filling them in on either side, until I completed one full panel. While this definitely looks daunting, I promise this goes much quicker once you get the hang of it!
 Once you've completed one panel, move on to the next. It's important to hold your pumpkin by the stem, and be mindful that fabric paint takes an extra long time to dry. But fear not, if you smudge anything, you can easily wipe off any mess-ups with a Q-tip and do it again.
 I let my pumpkin dry for a full 24 hours before picking it up to ensure that all of the little dots had completely dried. If you notice that the stem has paint rubbed off from handling, simply just go back with a small paint brush and white acrylic paint to touch it up.
Original article and pictures take http://www.hometalk.com/10838824/diy-hobnail-milk-glass-pumpkin site


Комментариев нет:
Отправить комментарий