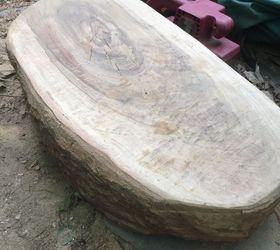
We got a bunch of free wood from a saw mill three years ago. One knotted chunk caught my eye and I envisioned a Log Stool!I knew it needed to "dry" before I worked with it so for three years it sat underneath our log cabin in the mountains! We used a chain saw and rounded the wood some at the ends. Then I went to work taking all the tree bark off. It was definitely harder than it looked!
 Next I sanded and sanded. I then gave it some Minwax Wood Conditioner and then followed with Spar Urethane! Now.....needed to add some legs!
 We had a cedar tree that had been dead for awhile. We cut it into four logs and made them each about 19" long. Then we used a router to narrow the end where the legs would fit inside the stool seat!
 I then sanded all four legs and we proceeded to drill holes into the seat to prepare for installing the legs. I got my hubbie to do this as he has much better experience working with wood!
 We inserted the legs and then used screws to secure then into seat. We used a level to make sure it was level. Believe it or not, it was level at first try! If not, we would have shortened the leg(s) accordingly!
 I then polyurethanes the legs too! I chose not to use any stain as I like seeing the grain in the wood! Now I have a perfect stool to sit on in front of the mirror at our log cabin! I mean even when we are "roughing" it at our cabin......sometimes it's nice to put on some makeup! And now I have the stool to sit on!
 Fits right in with the decor of the Log Cabinmy husband built by hand.
Original article and pictures take http://www.hometalk.com/10707835/knotted-chunk-of-free-wood-into-log-stool site


Комментариев нет:
Отправить комментарий